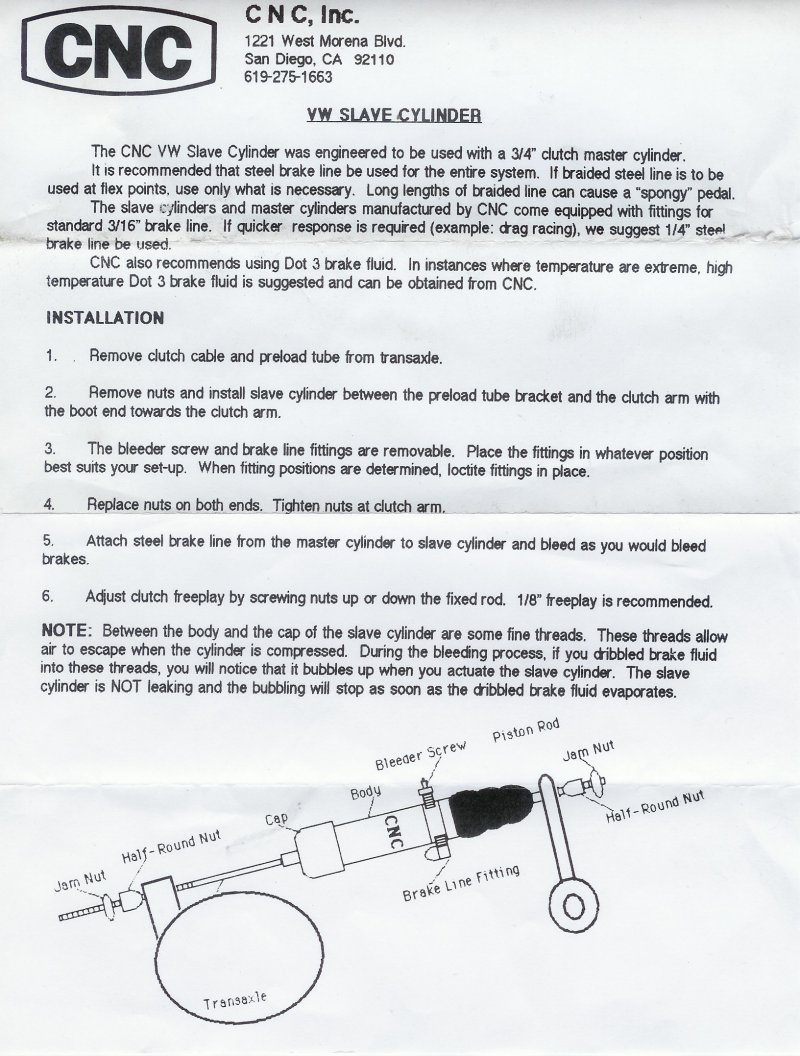
BRAKE THEORY AND HYDRAULIC CLUTCH


One of the most asked questions , when building a trike, concerns the brakes.  Most of the Stopping power in a cage is in the front  brakes. When you don't have two-front brakes what is best for a trike? On this page you will find some answers to your  questions. This page will also link you to other's web sites that contain information on how others handled the problem.


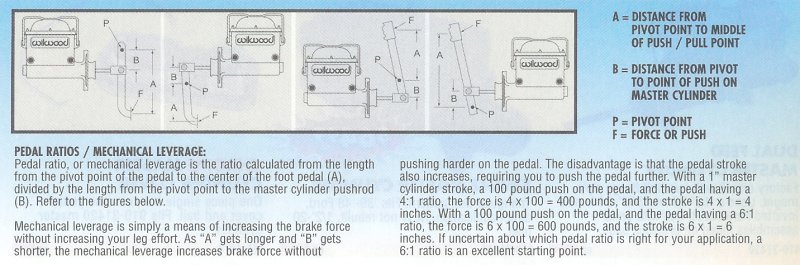
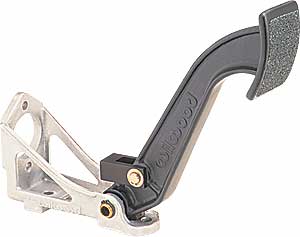
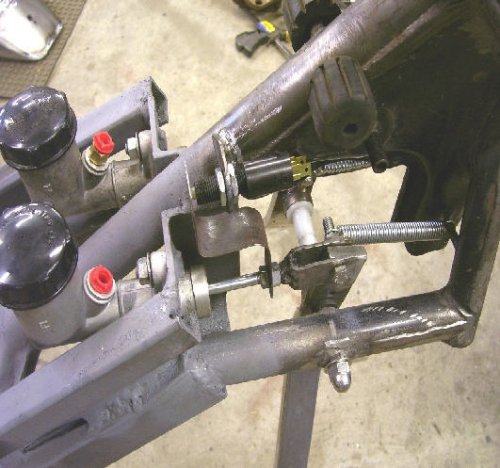
The ratio of the diameter of the plunger in the master cylinder to the diameter of the piston in the slave or wheel cylinder has  EVERYTHING to do with braking.  If the diameter of the plunger in the  master cylinder is greater than the diameter of the piston in the  wheel cylinder you won't have any brakes because you have no advantage. Also the distance between the pivot point of the brake pedal to the footpad is very important.  The longer the pedal the more mechanical  advantage you have.  The bore of the master cylinder should always be  smaller than the bore of the slave cylinder.  You pick up the extra  fluid to operate more than one wheel cylinder by the simple fact that  the stroke of the master cylinder is much much more than that  of the slave cylinder.  The rear brakes of a VW are weak at best.  If  everything is not just right they don't exist.


I have said this before but I guess it is worth repeating. Most of the time when disc brakes are used it is because someone couldn't get their drum brakes to work properly. If you can`t lock up your rear wheels, at speed, with drum brakes there is a problem with the braking system design that needs to be corrected before going to disc brakes. Disc brakes actually require more pressure than drum brakes simply because they have less braking area. That is the reason you never see a car with disc brakes without a power booster. Without the power booster, you will need more leverage on your brake pedal. The smaller the bore of the master cylinder, the more pressure that will be exerted on the brakes. Kind of like putting your finger over the end of a garden hose, you still have the same volume of water but it has a lot more pressure behind it. The purpose of a residual valve is to keep a small amount of pressure on the fluid in the lines. so all the fluid doesn't flow back to the master cylinder. On disc brakes less pressure is required (about 2 lbs) because there is no return spring on the pads. On drum brakes, more pressure is required (about 10 lbs) from the residual valve simply because the return springs on the brake shoes must be overcome. Some master cylinders, Harley for instance, have residual valves built into them. You cannot use a Harley master cylinder designed for drum brakes on a disc brake system as the built-in residual valve will cause the brake pads to drag. If everything in your sytem seems to be functioning properly, the chances are good that your problem lies in the mechanical advantage you have over your brake system. Either moving your brake rod closer to the pivot point on the brake pedal or lengthen your brake pedal will usually help in overcoming this problem. The really neat characteristic of a hydraulic system is there is no loss. If you exert 100 lbs of pressure on one end of a brake line, you will get 100 lbs of pressure at the other end, no matter how far away it is. The secret is to use that pressure to your advantage and not allow any of it to be lost.
 
Jim Sickler International Director BTW
 

Residual Pressure Valves

    • 2 PSI Valves - These valves are used in a disc brake system only and are required when the master cylinder is at, or below, the height of the calipers. It's purpose is to act as an anti-siphon valve preventing the brake fluid from siphoning back into the master cylinder when the brake pedal is released. Even if the master cylinder is even or slightly above the calipers, put one in anyway. If you don't and you park on a hill, fluid will siphon! These valves are cheap insurance - put them in!


      • NOTE: You will know if you need one of these valves if you had to pump the pedal twice to get a good pedal. See illustration for more.

      10 PSI Valves - These valves are used in a drum brake system to prevent air from being ingested into the hydraulic system when you release the brake pedal. Typical wheel cylinder seals only seal when there is pressure behind them. Rapid release of the brake pedal creates a vacuum in the system which causes the seals to relax and air is ingested into the wheel cylinders. Maintaining 10 PSI in the system at all times prevents this. Some disc/drum master cylinders have 10 PSI residual pressure valves installed internally, some don't.  Also, some new style wheel cylinders have cup expanders which negate the need for the residual pressure valve. Either way, if you are not sure whether you have one or not, put one in. They are not cumulative and it won't hurt anything if you have two. Don't worry about brake drag, it takes roughly 75 PSI to overcome the return springs.


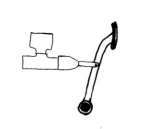
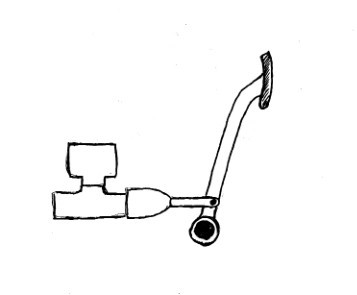
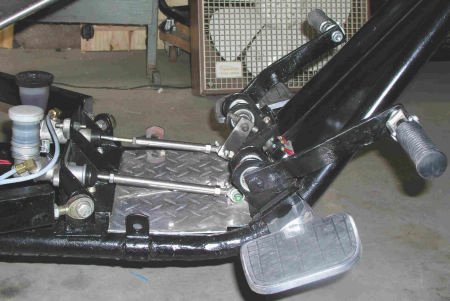
Simple Examples of pedal leverage


NO

YES


PEDAL RATIOS/MECHANICAL LEVERAGE


HOW TO DETERMINE IF YOU NEED RESIDUAL PRESSURE VALVES


DOES YOUR BRAKE PEDAL PUMP UP HARD THEN AFTER A LITTLE TIME GOES BY LOSE ALL IT'S PRESSURE?


The problem here is your brake adjustment.  If your brakes are not adjusted properly the master will pump up and seem to be hard.  Then after a few moments will lose all the pressure and bottom out.  This is because the shoes will expand to the brake drum, then when you release pressure on the brake pedal the shoes will retract to far and you lose the pressure.  Adjust the brakes properly (per the book) and the problem will go away.


REAR BRAKES

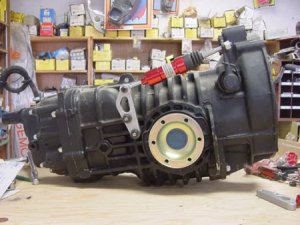
It's no secret that when you build a trike you must change the braking bias from the front to the rear.  One way to do do this is to install type 3 rear drums on your type 1.

If your like the rest of us you go down to the VW parts outlets or hunt through the wrecking yards for the parts and pieces.  

You will want to use 22mm wheel cylinders. Wider 40mm-wide linings can be used at the rear to increase lining durability and fade resistance.

The largest rear wheel cylinders available for a Beetle are the 19mm units used in '58 - '67 models, so many racers substitute 22mm front wheel cylinders from a '65-or-later Beetle. The 40mm-wide rear shoes can be adapted from any '68-or-later Beetle. To make the swap complete, use '68-or-later rear backing plates.

The best rear brake system, without resorting to costly disc brake setups, is an adaptation of the rear brake assembly from a '65-or-earlier VW Type-3 squareback, notchback or fast-back. Actually, linings and wheel cylinders can be used off any year Type-3. But to get the more desirable 5-bolt wheel-lug pattern, you must use a '65-or-earlier rear brake drum.


Type-3 45mm wide linings are half again as wide as the early Beetle 30mm linings. And the Type-3 has a 22mm wheel cylinder bore, the largest of all VW's. To install these in a '67-or-earlier Beetle, machine about 0.55-in off the surface of the drum that the axle nut tightens down against. Type-3 brake assemblies bolt right up without maching on '68 swing-axle Beetles and all IRS units.

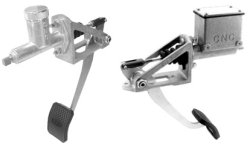
MASTER CYLINDERs

I have had good luck using the 5/8ths master cylinders with this set up. All else being equal, a larger master cylinder requires more pedal effort. If you get carried away and install too large a master cylinder, pedal effort may become too high. This will become very apparent to your leg after a few hours of driving.


T

For more information concerning Type 1 to Type 3 rear brake conversion click here


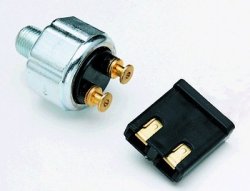
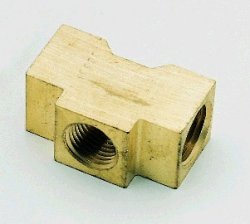
CLICK ON PICS TO GO TO JEGGS


P/N  Item# 950-260-2636 f/5/8

P/N 950-260-1304  f/3/4

P/N  950-340-1289

Click on pics  for catalog info

If you prefer to mount them from the top down you can get these. (or just mount the one above upside down)


INSTALLING A CNC VW SLAVE CYLINER


Eliminate broken and bent hydraulic slave cylinders.


On  my trike the slave cylinder rod  bent.  It appears that the bent rod were the result of improper alignment and binding between the trans mount and the clutch arm on the transaxle  The standard hydraulic slave cylinder installation utilizes the original mounting points that were designed and built for a Bowden tube and  clutch cable.  In addition, if you take a close look at how the slave cylinder is aligned after a typical installation, it appears that the mis-alignment,  places un-necessary lateral stress on the piston assembly.  This in turn may cause additional internal piston to cylinder binding leading to premature slave cylinder failure.  In order to correct the alignment you can use the slave mounting bracket shown below (this one is for the bus transaxles) used with Neal, Jamar and CNC Slave Cylinders. 

Click on pic to go to web site then type CPR311165B into the search box


For Swing Axle and IRS tranaxles click on the picture below.  This is used with Neal, Jamar and CNC Slave Cylinders. (Type in part number: 6075)


If you use the CNC slave you will need a 3/4 master cylinder.  Some slaves are sold with out the Heim joint at the end (as shown in the above picture) 

If you get one with out the joint, you can purchase a "female" heim joint then in order for it to fit properly you may have to shorten the rod going  to the cross shaft actuating arm.

(A Heim Joint is a mechanical articulating joint, generically known as a spherical rod end. Heim Joints are used on the ends of control rods, steering links, tie rods, or anywhere a precision articulating joint is required. A ball swivel with an opening through which a bolt or other attaching hardware may pass is pressed into a circular casing with a threaded shaft attached. The threaded portion may be either male or female.)


Mount shown on a bus transaxle


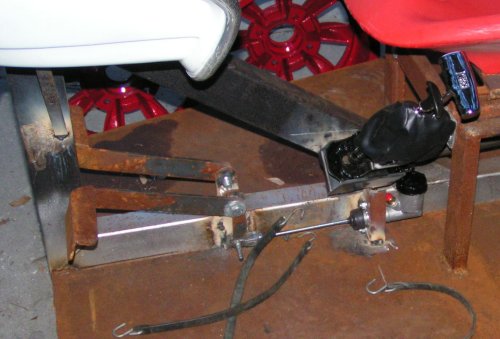
Another good way to make your pedals


Another way


The hydraulic brake line switch

My brake line switch is an in line pressure switch.  The switch is mounted at the rear of the split of the single line into the lines running to the right and left rear brakes.

 A good one can be found at Ronfrancis.com   (Click on "view or shop online catalog, then type in SW-32 for the switch and BL-18 for 1/4" brake lines or BL-18 for 3/16" brake lines.)   The switch is used in conjunction with a brake line "tee" and two adapters for the brake line. 


FOOT THROTTLE


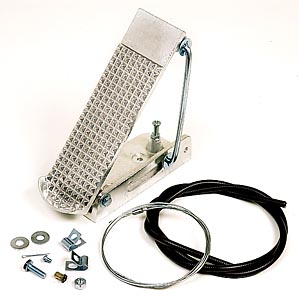
At first I used a hand throttle, like a standard m/c.   My wrist grew tired holding it open after awhile so I switched to a floor throttle as shown below.  These can be purchased from Speedway motors.  The Throttle assembly kit sold includes a cable with a 48 inch length.  If that isn't long enough for you they sell the cables in 60 inch, 72 inch, 84 inch, and 96 inch lengths at an extra cost.  (see catalog)


Click on pic to go to catalog.  Click on search part number and type in (P/N 720-4103)  for the kit.  PN 720-4128 for the 60" cable,  720-4129 for the 72" cable, 720-4130 for the 84" cable and 720-4131 for the 96" cable.


I needed just the cable w/o the casing and hardware.  It is a .080 7/19 strand cable.  I went down to our local marine store (West Marine) and they had the exact cable I needed:

 Flexible Stainless Steel Wire  Exceptionally strong Loos wire rope is developed and perfected for sailboat applications. Each strand is preformed and polished to eliminate wire's tendency to collect carbon particles and become brittle.  They had many sizes to choose from.  So if your looking for cable for your tirke check out your local marine supply store or go to WEST MARINE and order from their catalong (Type Flexible Stainless Steel Wire in the search box and then when asked for the department click on sail boat hardware)


(f you need a tube for your cable you can use brake lines)


Want power brakes on your trike?

Click here