|
|
|
|
PART 2 "HOW I MADE MY LEADING LINK FRONT END |
|||||
|
|
|
|
S | |
|
Stock Rake 35 degrees |
My Rake 55 degrees |
||
|
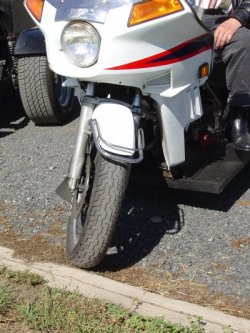
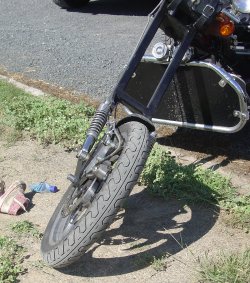
Before I started to build the front end I had to decide what size tire I wanted to use. Your wheel will determine what size your trees will have to be based on the width of the tire. This was easy for me as I had already purchased a mag wheel and had a tire installed. Mine is a 90/90-19 52H so I knew I could make my forks with 5 inches inside to inside measurement. Also I already knew what my rake angle is, 55 degrees. |
|
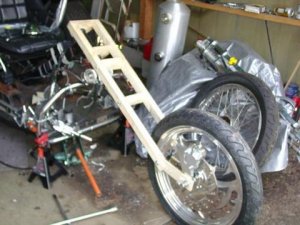
I decided to make a wooden mock up of the forks. That way I can make sure everything is right prior to actually having the metal cut, etc., (I'm not good enough to do my own cutting and sizing. I have a machinist who does all that for me, that way I know everything will be perfect) I already own a small table saw and jig saw so it wasn't too hard to make the mock up to scale. I cut the forks 1 1/2 x 1 1/2 and I cut them too short. I also made the rockers too short as can be seen in the photo's below. (Nice to find this out before cutting or having them cut) You can't see it but my trike is held up at it's normal level by jacks under the front floor. You may have to rig something to hold yours up. |
|
|
|
Here is the basic measurements for my trike. You might want to change these to what ever you want for your trike. |
|
Triple Trees |
|||
|
|
Forks |
The rockers are cut out of 1/2 " pine and are 12" long. |
The spacers length between the forks is determined by the width of your front tire. |
|
The width of your trees is determined by the width of your front tire. Mine is 5" |
The greater your rake angle the longer your forks will have to be. Less rake the shorter. |
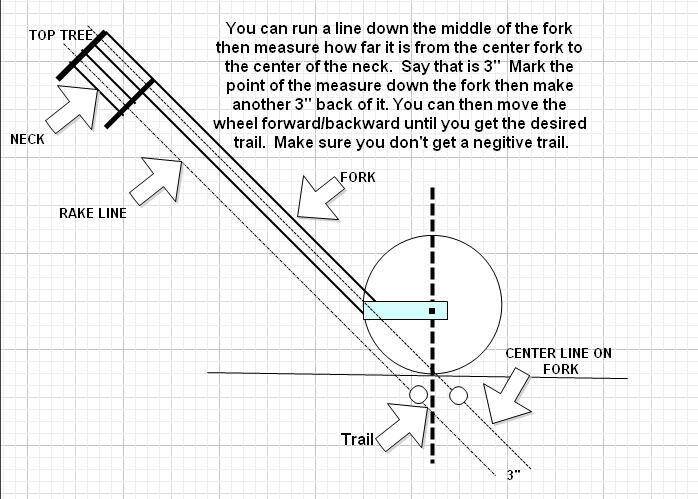
Your trail is determined by the length of the rocker. More later. |
Your trees will be 7" between one another. (Standard neck size) You want this as perfect as you can get. |
|
So now mount the wooden trees to your trike. Make sure the level of the trike is what yours will be when you are finished. Use jacks or what ever it takes to get that level. Make a block for the front tire to sit in. |
|
|
|
This is the only picture I have of the "block" I'm talking about. The rest is getting a little ahead of the game here. So don't pay any attention to anything but the block....In your wooden mock up trees you need to cut a slit in the middle of the bottom for the rockers to fit into.
Then drill a 1/2" hole through both of the wooden tubes. Make this as even as you can. Cut out the wooden rockers and drill a hole that your axle will fit into at about 1/2" from the end then another one every inch or so back towards the tube from it. Mount your tire in the one close to the end away from the tube, then measure your trail. |
|
|
|
Adjust the tire by moving it back in the rocker until you have 1" - 2"s of trail. I used a laser to determine my trail. |
|
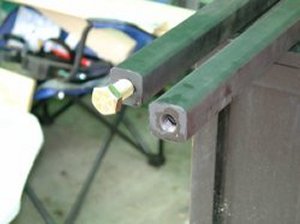
Ok, now we have all our measurements and are ready to make the real thing. The forks are 1 1/2" square tube with 1/4" walls. Schedule 80. Like I said earlier I will draw out everything so my machinist can cut it all out for me. I'm not that great at getting every thing just right and I want every thing just right on my front end. |
|
The only other thing that I wanted installed on the forks was a brass bushing at the bottom where the rocker attached to the tube. |
|
Tubes, Trees and rockers back from the machinist. Now we want to weld a 3/4 nut into the top of each tube, so that we can bolt the tubes to the trees. |
|
|
|
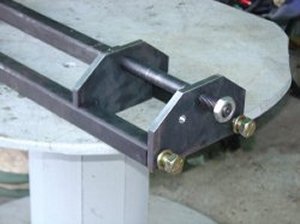
Now the fun began. I had to find a large bolt to fit the neck and bearings I was using. So first of all I had to get the bearings for the neck I had. As I have stated before I bought a trike that was already half built, so it had a neck and some old bearings that had a number on them. I traced the number and then was able to purchase a set of timkin bearings. Then I had to find a long bolt that would fit into the bearings. I found it at Tacoma Screw. The problem with the bolt was that it was rough where the bearings would fit on. So, I took it to my machinist and had it smoothed up. So once you get this neck bolt (maybe you already have it) you can assemble the forks to the triple trees. |
|
|
|
Back from the machinist. Now you can set it up for tac welds |
|
|
||||
|
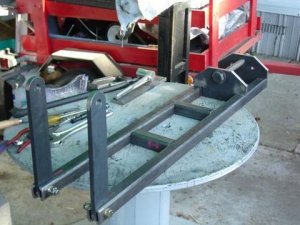
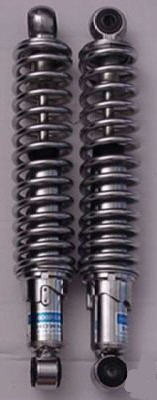
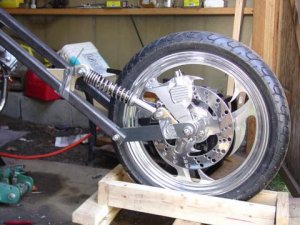
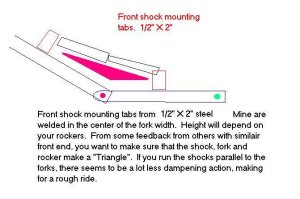
Now we need to make the shock mounts and decide where to place them on the tubes and rockers. I cut out the forms from the 1/2 inch pine and then using duct tape fitted them to the forks. I already have ordered and received the shocks. I ordered them from a m/c recycle parts place earlier. These are from a Honda CM-200. I later change to a more stiffer shock that is used on 650 - 750 bikes. The one I purchased off of ebay was a set of YAMAHA SHOWA Vintage Motorcycle Shocks.
|
||||
|
|
||||
|
||||
|
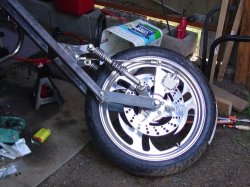
I then took the drawings of the shock mounts to my machinist to have them made. After I got them back I tac welded them to the tubes. The set up ready to take to the welder. Yes, I weld. But this is a critical item. I don't want it warped or chance a bad weld that will leave me on the street someplace. It's worth the extra cost to have a "pro" do it right.....I have had people who should know what they are looking at tell me that it is a perfect front end with everything set up right. |
||||
|
||||
|
The result is a front end that is very easy to turn at all speeds, doesn't shake or wobble when backing up, has a very tight turning radius and is very smooth on the bumps, etc. |
||||
|
|