|
|
|
|
WIRING YOUR TRIKE (1) |
|
After installing all lights, gauges, switches, horn, alternator or generator and complete engine we will be ready to start wiring the trike The way I do it is I wire one thing at a time. Test it then go on to the next one. |
|
By now you should have your battery mounted in the trike. I install one or more terminal blocks about midway between the front of the trike and the rear. Makes it easier to replace, run (when you have two wires to run front and rear, etc.,) or trace your wires from front to rear.
|
|
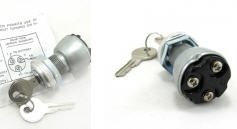
I also use test leads to make sure I have it right and it works. (the battery is not connected yet) I have no idea what kind of ignition switch you will be using. |
|
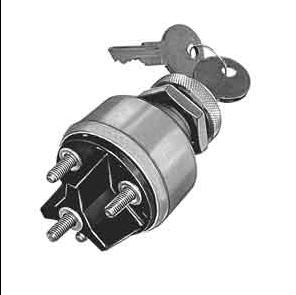
So I will be using this keyed off/on/acc type for this wiring diagram. You can get this switch at http://www.lowbrowcustoms.com |
|
This all-purpose keyed ignition switch can be used when wiring your bike, it features 3 positions, off, accessories, and on. Easy to wire, it even includes instructions! Comes with two keys. |
|
|
|
Purchase a ground strap to go between your frame and transaxle (very important) Install an engine ground strap from the transmission nose cone to the frame of your trike. If you don't you will have alt. and starter problems along with other things.
TRANSMISSION NOSE CONE TO CHASSIS - GROUND STRAP |
|
When you purchase a positive battery cable get one like this (Use an ATC Fuse Holder) |
||||
|
|
||||
|
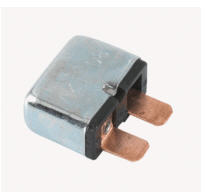
Also purchase a 30 amp ATC plug in circuit breaker
|
||||
|
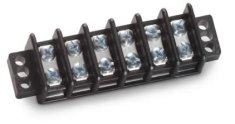
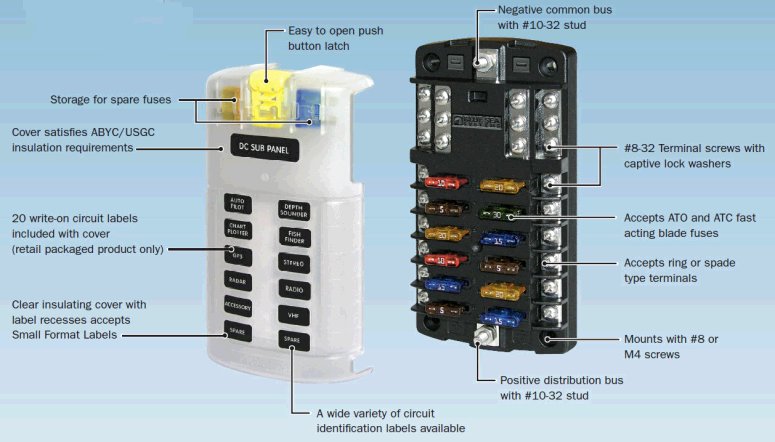
This is the type of fuse panel I use. |
||||
|
|
||||
Blue Sea 5026 ST Blade Fuse Block w/ Cover - 12 CircuitThese can be purchased on Ebay for less than $50. + shipping (of course) |
||||
|
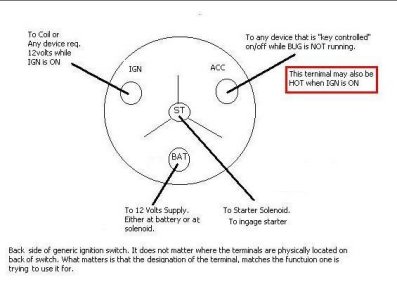
The Generic Starter Switch (I don't use this but in case you do here is how to wire it) |
||||
|
||||
|
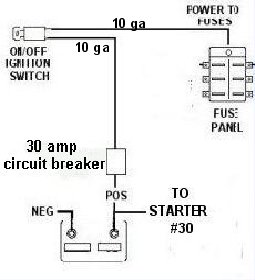
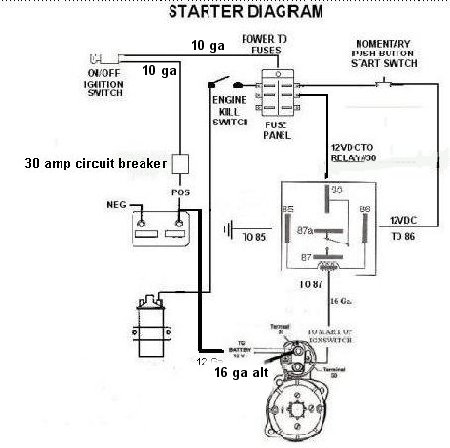
Attach the lug to the positive on your battery (don't attach the other side to the starter as yet) Attach a fuse holder with a 30 amp circuit breaker installed, then add a 10 gauge wire from there to your ignition switch (yellow on the universal) in on the keyed switch. You should have your fuse panel installed where you want it by now. Run another 10 gauge wire from the output on the keyed switch ( from the red pole on the universal) to the input of your fuse panel. You should have a diagram something like this: |
||||
|
|
||||
|
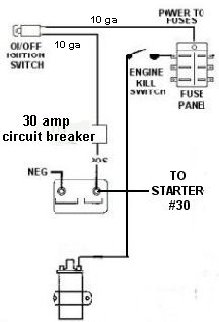
Now we will run a 16 gauge wire from the fuse panel to your kill switch, this switch can be one on your handle bar controls or a regular off/on switch. From the kill switch the wire will run to the positive side of your coil. |
||||
|
|
||||
|
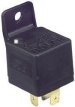
Now for the starter. I use a 30 amp relay on my starter. Run a 16 gauge wire from your fuse panel to the starter switch, 12vdc in. From the other side of the starter switch 12vdc out, run another 16 gauge wire to two blades on the starter relay (you will splice another wire into the one coming from the starter switch as shown on the schematic) These two wires will have female blade connectors and will connect to blades 30 and 86 on the relay. Blade 85 on the relay is ground and 87 is a 16 gauge wire to terminal 50 on the starter. So, with the exception of attaching the positive wire from the positive side of the battery we have completed wiring the starter circuit. |
||||
|
Why you should use relays on your trike
Two Reasons to Use a Relay: The second reason to use a relay is
to isolate two circuits. If you needed to control a very high voltage
circuit with a 12 volt controller, you could use a relay. Since a relay coil
is 'generally' isolated from the contacts, you typically have complete
isolation between the 'input' and 'output' section of the relay. Of course,
the input of the relay is the relay coil and the output would be the
contacts.
|
||||
|
|
||||
|
|